.

.

.

.


Blogarama - The Blog Directory


GOOGLE FRIEND CONNECT

Showing posts with label delicious. Show all posts

September 25, 2012

Pinterest Recipe Success!

While going through my Pinterest boards the other day I decided I should pick at least one thing from my recipe board to try out. It's so easy to just pin away all these wonderful ideas and recipes, but quite another to actually follow through with doing them. 

 I decided upon "Oven Baked Chicken Fajitas". I had some leftover chicken to use up and figured this was a good choice. It is also a healthy meal, which is always a plus. And it's quick and easy with little clean-up in the end.  Oh and it's affordable too :)

My family enjoyed this dish, and my daughter commented on how she liked it better than the original fajitas I normally make.  My son, who loves spicy foods, added some hot sauce to his.  I thought it was perfectly spicy for my taste.

Before I share the recipe with you I would like to give credit to Laura from Real Mom Kitchen who came up with the recipe.  Thank you Laura! I will be sure to visit her blog often as she has many awesome recipes to share.


                            Oven Baked Chicken Fajitas
Original Recipe by Real Mom Kitchen


1 pound boneless, skinless chicken breasts cut into strips
(I used my precooked chicken which worked well).

2 Tbsp Vegetable oil (I used Olive Oil with good results)
2 tsp Chili Powder
2 tsp Cumin
1/2 tsp Garlic Powder
1/2 tsp dried Oregano
1/4 tsp salt
1 (15 oz) can diced tomatoes with green chilies
1 medium onion, sliced
1 large bell pepper, seeded and sliced (I used one small red and one small green)
12 flour tortillas (I used whole wheat tortillas)
Toppings such as cheese, sour cream, and guacamole, if desired

1} Preheat oven to 450 degrees. Place chicken strips in a greased 9x13 baking dish
2} In a small bowl combine oil, chili powder, garlic powder, dried oregano, and salt
3} Drizzle the spice mixture over the chicken and stir to coat
4} Add the tomatoes, peppers and onion to the dish and stir to combine
5} Bake uncovered for 20-25 minutes, or until chicken is cooked through and the vegetables are tender.
6} Serve on tortillas with desired toppings


I'd love to hear if you've had any successes or fails with recipes found on Pinterest?! 

Be sure to stop back after 12PM US EST today for my Wordless Wednesday Blog Party! 


I love to see what you all 
have to share each week, and 
always return the Linky L♥ve :))

Photobucket
Share this PostPin ThisShare on TumblrShare on Google PlusEmail This

July 30, 2012

Monday's Mmmmm!

Today's Mmmmm is sure to put a smile on your face. 
 Well only if you like Almond Joy Bars 
and homemade ice cream! 

 Over the weekend I decided I just had to make Almond Joy Ice Cream. I scoured the internet for what I hoped would be a mixture that would stay creamy, even after fully frozen. And I'm happy to say I found it! 

 I used my ice cream maker for this recipe, but if you don't have one you can try just freezing the mixture in an air-tight container. It may not be as creamy, but I have a feeling that it would still be pretty delicious.

Enjoy :)


photo-1


Ingredients:
1 cup almond milk
2 cups sweetened coconut cream
2 cups whipping cream
1/2 cup coconut flakes
1 cup chocolate chips (mini, regular or chunks, whichever you prefer)
1/2 cup slivered almonds, if desired 


Directions:
In a large bowl whisk milk and coconut cream together until smooth and frothy. Slowly add whipping cream, whisking until completely incorporated. Turn ice cream machine on, and slowly pour in mixture. Let mix for 20 minutes.


Add coconut flakes, chocolate chips, and nuts if using, and continue mixing another 10 minutes.


Ice cream will be the consistency of soft-serve once mixing is complete. Either serve immediately or transfer to a air-tight container, seal, and freeze for an additional 2-4 hours. (Once my ice cream was frozen for 24 hours it was pretty hard, but still kept it's creamy consistency.)


The sad part is that after a weekend of eating waaaaay too much ice cream, I must get back on track with healthy eating.  Until next weekend that is.  I already have another ice cream flavor in mind...


Be sure to stop back to see what else I'm up to this week including my Wordless Wednesday Blog Party, Fabulous Friday Finds, and my NO RULES Weekend Blog Party.


Have a great week!
Photobucket

Share this PostPin ThisShare on TumblrShare on Google PlusEmail This

July 12, 2012

Perfect for a Hot Summer Day ...


I love it when this girl of mine has a plan.  She will announce to me what the plan is, 
and then there's no stopping her.  Yesterday the plan 
was to make homemade lemonade.  

So off to the store we went.  Autumn was all excited at the store choosing her
 own lemons, without any assistance 
from me of course :)

Once we were home I was assigned the job of letting her know what to do, and that's all I was needed for.  (Oh yea, and also to take over when her arm grew tired from squeezing lemons.)  

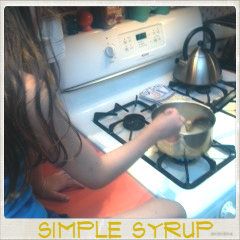
I found the perfect recipe, which involved making simple syrup so that the sugar is fully dissolved before mixing with the lemon juice.  The entire process was actually super easy, and Autumn was able to do most of the work, 
with my supervision of course.  

Here's how we did it:


1}  Mix together 1 cup of sugar and 1 cup of water in a saucepan 
Stir over medium heat until sugar dissolves; Set aside


2}  Gather four lemons and whatever tools you choose to use to squeeze out the juice. 


3}  Squeeze until you have 1 cup of lemon juice.


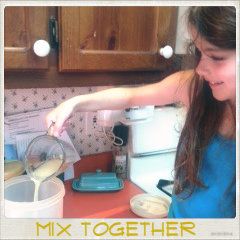
4}  In a pitcher mix together the simple syrup, lemon juice and 3-4 cups cold water, depending upon your taste preference.


5}  Refrigerate 20-30 minutes, or until nice and cold.

6}  ENJOY!

The silly part of this entire thing was when we were drinking our first glasses of the lemonade, I commented upon how delicious it was.  Soooo much better than any store-bought lemonade.  Autumn's comment was so her ~  "It's ok". 

I can't believe the end of the week is nearing already.  With tomorrow being Friday, I will be back with my "Fabulous Friday Finds" blog post.  

If your new to my blog, this is when I choose a theme, search Etsy for nine handmade, repurposed and/or vintage items which fit this theme, then create a collage which I showcase here.  There's always a direct link to each shop if you'd like to see more from a particular artist.  

And I'm also always looking for new theme ideas, or items to be featured.  If you have an idea for a theme, or your an Etsy seller with an item you'd like to be considered for a feature, just send me a message! I'd love to hear from you!

Also beginning Friday evenings and lasting through the weekend, is my new "No Rules Blog Party"! This is where you submit your thumbnail linky and go! No rules to tie you down. (Of course if you follow me or comment I ALWAYS return the ♥).


Have a lovely day!

XO, 


Photobucket
Share this PostPin ThisShare on TumblrShare on Google PlusEmail This

July 5, 2012

Recipe Time!

This time last year I made the yummiest dessert using blackberries. It was so good, that I shared the recipe here. 

Everyone who tasted these bars said that they were amazing. So, the facts that an entire year has gone by, and I plan on making these again real soon, had me thinking that I needed to share this one again!  

Enjoy!

Blackberry Pie Bars


Crust and Topping
3 cups all-purpose flour
1 1/2 cups sugar
1/4 tsp salt
1 1/2 cups (3 sticks) unsalted butter, chilled


Fruit Filling
4 large eggs
2 cups sugar
1 cup sour cream
3/4 cup flour
pinch salt
zest of 1/2 lemon
1 tsp almond extract
2 (16-oz) packages frozen blackberries, thawed and drained, Or fresh if available


To make the crust and topping, preheat the oven to 350 degrees. Grease a 9x13 inch baking pan.


Combine the flour, sugar, and salt in the bowl of a food processor. Pulse a few times to mix. Cut the butter into 1/2-inch cubes, and add to the flour mixture. Process until the butter is evenly distributed but the mixture is still crumbly, 30-60 seconds. (I didn't use a food processor, rather just forks to cut in the butter.)


Reserve 1 1/2 cups of the mixture to use as the topping. Press the remaining mixture into the bottom of the pan, and bake 12-15 minutes. Cool for at least 10 minutes.

To make the filling, whisk the eggs in a large bowl, then add the sugar, sour cream, flour, salt, lemon zest, and almond extract. Gently fold in the berries and spoon the mixture over the crust. Sprinkle the remaining flour mixture evenly over the filling, and bake 45 to 55 minutes.

Cool at least 1 hour before cutting into bars, or scoop out of the pan to serve cobbler-style.

* Recipe source pinkparsley.com


Be sure to stop back tomorrow to find out what my theme for my "Fabulous Friday Finds" post will be!  If your new to my blog, this is when I choose a theme, search Etsy for nine handmade, repurposed and/or vintage items which fit this theme, then create a collage which I showcase here.  There's always a direct link to each shop if you'd like to see more from a particular artist.  

And I'm also always looking for new theme ideas, or items to be featured.  If you have an idea for a theme, or your an Etsy seller with an item you'd like to be considered for a feature, just send me a message! I'd love to hear from you!

Also beginning Friday evenings and lasting through the weekend, is my new "No Rules Blog Party"! This is where you submit your thumbnail linky and go! No rules to tie you down. (Of course if you follow me or comment I ALWAYS return the ♥).


Have a lovely day!

XO, 


Photobucket


Linking up with these lovely blog parties!


    SixSistersStuff.com

Share this PostPin ThisShare on TumblrShare on Google PlusEmail This

May 21, 2012

Manic Monday Recipe Share!!

Wow it's already the beginning of a brand new week! Time to figure out what to have for dinner in between work, and the many commitments we have in our daily lives.  I know this is not always an easy task.  Especially when your trying to eat healthy.

If your a regular reader of my blog you'll know that lately I have been into sharing quick, easy, healthy recipes.  This has become a fun habit for me, as I've been finding all these really great meals that I may have not tried had I not been trying to become more healthy.

The best part is that the kids all seem to like everything I've made so far.  When I used to think healthy, I also thought bland, plain, blah.  But my entire outlook has now changed.  This fun challenge has also gotten us out of the "what to have for dinner" rut.  

So I now share with you my favorite healthy recipe from last weeks dinner menu :)

Enjoy! 


1 lb. round steak sliced into thin strips
1 clove garlic minced
1/2 cup chopped onion
1 can low sodium beef broth
2 tbsp cornstarch
1 tbsp brown sugar
1 tbsp (or to taste) low sodium soy sauce
1/4 tsp garlic powder
1/4 tsp ginger
4 cups broccoli florets
4 cups cooked brown rice

1}  Coat skillet with cooking spray and heat over medium heat for one minute
2}  Add beef, onion, minced garlic and stir fry until brown
3} Remove beef, drain and set aside
4} Add half the broth and broccoli to pan (I also added some fresh asparagus) Cover and cook until veggies are tender-crisp
5} Mix cornstarch, brown sugar, garlic powder, ginger and soy sauce with remaining broth until smooth
6} Add mixture to pan and cook until it begins to thicken, stirring constantly
7} Return beef to pan, stir til thoroughly heated
8} Serve over rice 


Tomorrow I will be back to share photos from my son's eventful weekend including a prom, and a graduation.  Such a busy time of year!!

I would also like to thank Create-with-Joy.com for including my recipe post for 
15 Minute Chili in their "Inspire Me Monday" meme!! Thanks so much :))  

Hope you all have a great week!!

xo,
Photobucket
Share this PostPin ThisShare on TumblrShare on Google PlusEmail This

May 14, 2012

Recipe Time! 15 Minute Chili

Wow is it Monday already? As promised I'm back with a chili recipe that is not only fast and delicious, but HEALTHY! After this past weekend's celebrations, I'm back on track eating healthy foods. I'm even drinking a strawberry smoothie as I type this post :)

 I know chili isn't your normal summery food, but it is perfect for a rainy day,
or if you don't feel like cooking on the grill. I made this one night last week,
 and it actually tastes better than my regular chili recipe made with ground beef.
Everyone in my house agreed that this was delicious.

Enjoy :)


Ingredients

1 pound ground turkey
1/2 cup chopped onion
1 16 oz. can pinto beans, drained and rinsed
1 16 oz. can kidney beans, drained and rinsed
1 28 oz. can chopped stewed tomatoes
1 tablespoon chili powder
1 tablespoon cumin powder
1/2 cup salsa

 Directions

 1. In a large pot, brown turkey with chopped onion.

 2. Add beans, tomatoes, garlic, chili powder, cumin, and salsa to turkey mixture. Cook until hot.

 3. Serve with cornbread, cooked pasta, cooked rice, or on top of a baked potato. Sprinkle with cheese if desired.

 Makes 4 servings

Recipe and photo source sparkrecipes.com

Hope you all have a great week.  
Tomorrow I'll be back with a craft I've been working on which I 
found on Pinterest.  All I can reveal at this point is that this has turned into quite the project, 
and you'll thank me for being the test subject!


xo,


Photobucket
Share this PostPin ThisShare on TumblrShare on Google PlusEmail This

April 19, 2012

Recipe Time!

 Last night was one of those nights when I had no idea what to make for dinner. We're still dealing with the allergic reaction Autumn has been suffering from since the weekend, which by the way turned out to be a bad case of poison ivy. So instead of grocery shopping, we've been doctor and pharmacy visiting. Normally I plan my meals for the week ahead of time, but this week we've just been winging it.
 
 
As I wearily browsed online trying to find something easy, fast, and tasty, I came across a recipe for "Easy Taco Rolls". Normally I probably wouldn't have attempted this recipe, but because it had good reviews I gave it a shot. Thankfully I did because it was everything I was looking for ~ easy, fast, and tasty, and inexpensive as well :)
 
 
So I now share this recipe with you ~ Enjoy :)
 
 
Easy Taco Rolls

1/2 cup uncooked instant brown rice
1 cup water
1-1/2 lbs ground beef
1 packet of lower sodium taco seasoning mix
1 15 oz can black beans, drained and rinsed
1/2 cup water
1-1/2 cups shredded cheddar cheese
8 10" tortillas (either flour or whole wheat)
1 16 oz jar salsa
1-1/2 cups shredded cheddar cheese

Directions:

1} Preheat over to 450 deg. Spray two 7-1/2 x 11" baking dishes.

2} Cook rice according to package directions

3} While rice is cooking brown ground beef and drain any excess grease

4} Reduce heat to medium and stir in taco mix, black beans, 1/2 cup water, 1-1/2 cups shredded cheese, and the cooked rice. Cook and stir until the cheese is melted, and the beans are hot.

5} Spoon mixture into the tortillas, roll into a tight cylinder, and place into a baking dishes. I placed four tortillas in each dish.
6} Pour the salsa over the tops, and sprinkle evenly with 1-1/2 cups shredded cheddar cheese.

7} Bake until the cheese has melted and begins to brown, approx 10 minutes.


Have you come across any new recipes that turned out delicious and you would try again? This is definately at the top of my list.

Don't forget to stop back tomorrow to see what theme I've chosen for my "Fabulous Friday Finds" blog post! Each week I choose a theme, scour Etsy for nine awesome products which fit that theme, and then create a beautiful collage showcasing these items. 

If your an Etsy seller and would like one of your items included in this feature, just send me a message!  These posts are one of my most viewed posts, along with WW and recipes :)) And I'm all about promoting!

xo,
Photobucket
Share this PostPin ThisShare on TumblrShare on Google PlusEmail This

January 3, 2012

Red Velvet Whoopie Pies!


In my family "Whoopie Pies" were a common dessert that we loved as kids, and still love today. You may ask "what is a Whoopie Pie?". I've read a bit about how in different parts of the United States this dessert is also called "Moon Pies", and in some parts of the US they are unheard of. As for other countries, I'm curious as to whether or not these even exist??

Anyways, regular "Whoopie Pies" are little chocolate cakes the size of a cookie, or larger if desired. You mix the batter, bake little circles of the batter on cookie sheets, and then fill them with a creamy filling similar to buttercream frosting, but with fluff added to the mix.

Over the holidays I wanted to make something not just special, but kid-friendly as well. I started brainstorming ideas such as a "Red Velvet Cake" or cupcakes. Then I wondered if there was a recipe out there for "Red Velvet Whoopie Pies", and sure enough there was.

I located a good recipe that did not call for a boxed cake mix to be used, as most of the other recipes I found did. It was a bit of a risk making something semi-new for a holiday, but I decided to take a chance and the results were fantastic. They were so yummy in fact that I decided to share the recipe :)


Red Velvet Whoopie Pies
Adapted from Grouprecipes.com
Makes approx. 60) 1", 42) 2", or 24) 3"

Cake Ingredients

2 cups all-purpose flour
2 Tbsp. unsweetened cocoa powder
1/2 tsp. baking soda
1/4 tsp. salt
1/2 cup butter, softened
1 cup packed brown sugar
1 egg
1 tsp. vanilla
1/2 cup buttermilk
1) 1 oz. bottle red food coloring (2 Tbsp.)


Cake Directions

1) Preheat oven to 375 degrees.  Lightly grease two cookie sheets. Set aside.

2) In a medium bowl combine flour, cocoa powder, baking soda and salt.  Set aside.

3) In a large mixing bowl beat butter on medium to high speed for 30 seconds.  Beat in brown sugar til light and fluffy.  Beat in egg and vanilla. Alternately add flour mixture and buttermilk, beating well after each addition, but until just combined. Stir in food coloring.

4)  Spoon batter onto cookie sheets in 1" or 2" diameter rounds, leaving 1" between each. (If you'd like them a bit larger you can go up to 3", but you won't have as many.)

5) Bake 7-9 minutes for 1" sizes, 9-11 for 2" sizes, and estimate timing for larger sizes, all until tops are set.

6) Carefully remove from baking sheets and cool on racks.

 
Filling Ingredients
1/4 cup butter, softened
4 oz. cream cheese, softened
1) 7 oz. jar marshallow cream
2-4 cups confectionary sugar

Filling Directions
7) In a medium mixing bowl beat butter and cream cheese until smooth.  Fold in marshmallow cream.

8) This is where I made an adjustment to the filling recipe;  Add 2-4 cups of confectionary sugar, or until filling is of desired consistency. 

9) To fill, dollop filling on the flat sides of half of the cakes, and top with remaining cakes, flat sides down. 

Enjoy!

Photobucket
Share this PostPin ThisShare on TumblrShare on Google PlusEmail This

December 22, 2011

a Christmas kiss . . .


I've finally begun my holiday baking beginning with these little goodies above. One batch never seems to be enough, so of course I made a double-batch. It's difficult to keep everyone away from them while they are cooling, and a bunch are already missing!

The best it yet to come though. My favorite holiday cookies are one's that my grandmother would make for us every year. Not only do they bring back many memories for me, but they are delicious, AND cute!

Over the next few days I will be sharing more cookies photos, as well as the recipe for my favorites that I mentioned above. So back to the kitchen I go to become covered in flour from head to toe.
(<----Yes this is true :) Maybe I'll share a photo of this as well!


Photobucket
Share this PostPin ThisShare on TumblrShare on Google PlusEmail This

November 26, 2011

Cupcakes to die for !

Choosing which dessert to make for a holiday is always a tough decision. There are so many yummy things to pick from. For Thanksgiving dessert this year I decided upon Black Bottom Cupcakes. They are chocolately, but not overly sweet. The taste was described by my relatives as "to die for". So today I've decided to share my recipe with you :)


Black Bottom Cupcakes


1 6oz. package of cream cheese, softened
1/3 C sugar
1 egg
1 6oz. package (1 cup) semi-sweet chocolate chips
1-1/2 C all purpose flour
1 C sugar
1/4 C unsweetened cocoa
1 tsp baking soda
1/2 tsp salt
1 C water
1/3 C oil
1 tbsp vinegar
1 tsp vanilla

Heat oven to 350 F. Line 18 muffin cups with paper baking cups. In small bowl combine cream cheese, 1/3C sugar and egg, mix well. Stir in chocolate chips, set aside.

In a large bowl combine flour, 1 cup sugar, cocoa, baking soda and salt. Add water, oil, vinegar and vanilla. Beat 2 minutes on medium speed. Fill each paper-lined cup half full. Top each with 1 tbsp of cream cheese mixture. 

Bake at 350F for 20-30 minutes, or until cream cheese mixture is light golden brown. Cool 15 minutes and remove from pans. Cool completely then store in refrigerator.
Enjoy!

Photobucket
Share this PostPin ThisShare on TumblrShare on Google PlusEmail This