.

.

.

.


Blogarama - The Blog Directory


GOOGLE FRIEND CONNECT

Showing posts with label cookout. Show all posts

May 27, 2013

Memorial Day ...


For me Memorial Day has two meanings.  The first that it is the kickoff to summer.  
Out come the shorts and swimsuits, and the BBQ's begin.

The second, and most important, is to remember those who fought for our freedom, and paid the ultimate sacrifice of loss of life.  It is also a day to thank the brave who fought and made it through, and to those who fight for our freedom today.

Below is a free printable created by the lovely Erin from How to Nest for Less.
I just discovered her sweet blog today and am so happy that I did!


Below I'm sharing two infographics with some information 
about Memorial Day you may not have heard before. 


How do you celebrate Memorial Day?

My family will be attending our town's Memorial Day 
Parade & Ceremony followed by a little BBQ.

However you choose to spend your day, 
I hope it's a good one.


Looking Ahead:

♥ Tomorrow I'll be back to share a few Father's Day cards that I made over the weekend!

♥ If you participate in Wordless Wednesday be sure to stop back here tomorrow afternoon {Tuesday} anytime after 12 PM US EST, and link up!   I love to see what you all have to share each week :)

♥  Thursday is my designated day of the week where I will reveal some things about myself that you may not know by just reading my blog alone, in my post titled "The Girl Behind the Blog".  Last week I shared my slight hair obsession ~ weird but true lol.

♥  If you haven't yet entered my GIVEAWAY for a free customizable love coupon booklet there's still plenty of time!  You can read my product review and enter HERE!

♥ And last but not least, if you love blog parties like I do, I also host a NO RULES Weekend Blog Party beginning Thursday afternoons.  This is a fun one, because you can share anything you like!  I want to shout out a GIANT THANK YOU to all of last week's participants! You help to make the party a huge success! 


Sincerely,

Paula

Share this PostPin ThisShare on TumblrShare on Google PlusEmail This

May 21, 2013

Wordless Wednesday Blog Party with Linky!


Cuteness 

Overload!


What do you think ~ cute or creepy?

Now it's your turn to show me what you've got, wordless or not! 
 Link up your WW photos below ~ I always return the Linky L♥VE! 

If you'd like to display my WW button on your blog, 
 just click on the "My Buttons" tab on my right side-bar :) 


Sincerely,

Paula

Share this PostPin ThisShare on TumblrShare on Google PlusEmail This

July 5, 2012

Recipe Time!

This time last year I made the yummiest dessert using blackberries. It was so good, that I shared the recipe here. 

Everyone who tasted these bars said that they were amazing. So, the facts that an entire year has gone by, and I plan on making these again real soon, had me thinking that I needed to share this one again!  

Enjoy!

Blackberry Pie Bars


Crust and Topping
3 cups all-purpose flour
1 1/2 cups sugar
1/4 tsp salt
1 1/2 cups (3 sticks) unsalted butter, chilled


Fruit Filling
4 large eggs
2 cups sugar
1 cup sour cream
3/4 cup flour
pinch salt
zest of 1/2 lemon
1 tsp almond extract
2 (16-oz) packages frozen blackberries, thawed and drained, Or fresh if available


To make the crust and topping, preheat the oven to 350 degrees. Grease a 9x13 inch baking pan.


Combine the flour, sugar, and salt in the bowl of a food processor. Pulse a few times to mix. Cut the butter into 1/2-inch cubes, and add to the flour mixture. Process until the butter is evenly distributed but the mixture is still crumbly, 30-60 seconds. (I didn't use a food processor, rather just forks to cut in the butter.)


Reserve 1 1/2 cups of the mixture to use as the topping. Press the remaining mixture into the bottom of the pan, and bake 12-15 minutes. Cool for at least 10 minutes.

To make the filling, whisk the eggs in a large bowl, then add the sugar, sour cream, flour, salt, lemon zest, and almond extract. Gently fold in the berries and spoon the mixture over the crust. Sprinkle the remaining flour mixture evenly over the filling, and bake 45 to 55 minutes.

Cool at least 1 hour before cutting into bars, or scoop out of the pan to serve cobbler-style.

* Recipe source pinkparsley.com


Be sure to stop back tomorrow to find out what my theme for my "Fabulous Friday Finds" post will be!  If your new to my blog, this is when I choose a theme, search Etsy for nine handmade, repurposed and/or vintage items which fit this theme, then create a collage which I showcase here.  There's always a direct link to each shop if you'd like to see more from a particular artist.  

And I'm also always looking for new theme ideas, or items to be featured.  If you have an idea for a theme, or your an Etsy seller with an item you'd like to be considered for a feature, just send me a message! I'd love to hear from you!

Also beginning Friday evenings and lasting through the weekend, is my new "No Rules Blog Party"! This is where you submit your thumbnail linky and go! No rules to tie you down. (Of course if you follow me or comment I ALWAYS return the ♥).


Have a lovely day!

XO, 


Photobucket


Linking up with these lovely blog parties!


    SixSistersStuff.com

Share this PostPin ThisShare on TumblrShare on Google PlusEmail This

June 7, 2012

Recipe Sharing Time! YUMMMMM :)

I know that I said today would be the day when I was going to share my results for the painted mason jar do-over, but unfortunately I am not yet ready. I am so dedicated to this project working out this time, that I don't want to rush it. The tutorial I am using for the do-over calls for a specific kind of paint which I could not find anywhere. Even substitutes for that paint were difficult to find. I did manage to eventually find what I needed, but not in time to complete the project for today. I promise I'm still working on this, and am quite optimistic that this will be a success to share within the coming days :) 

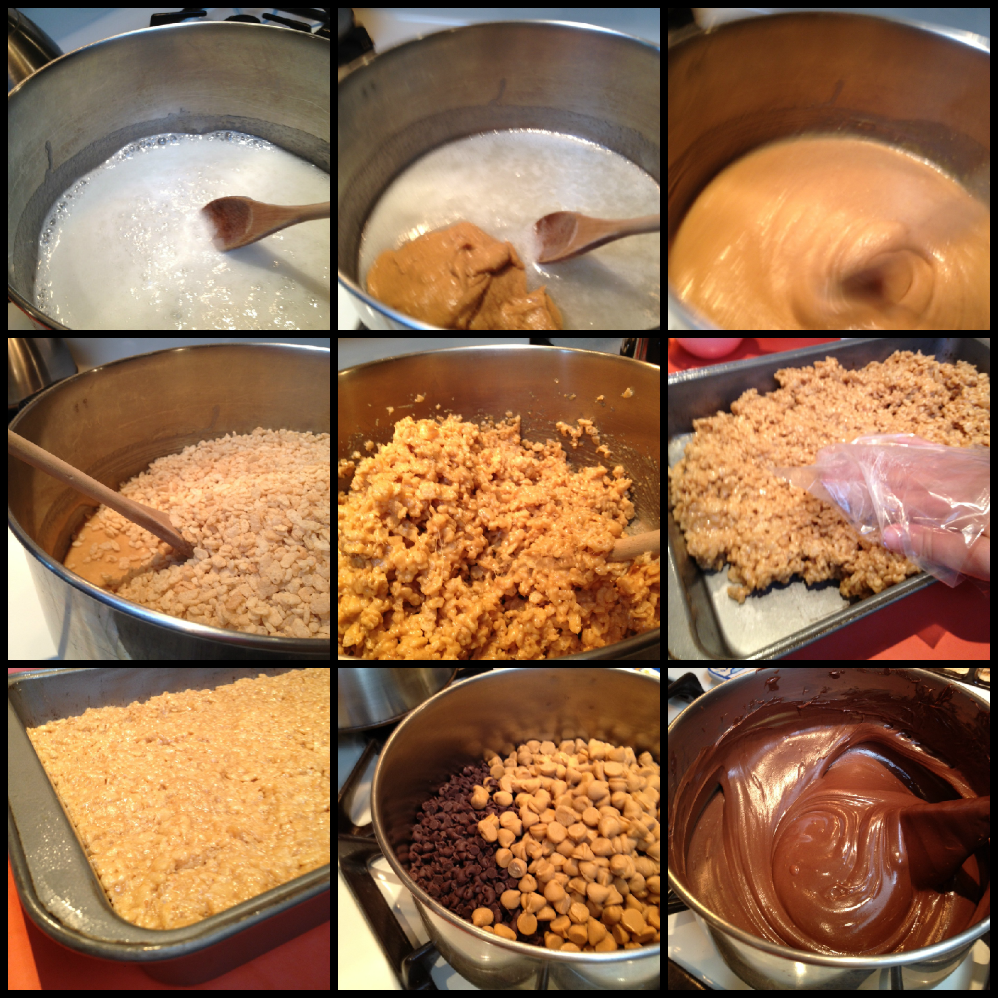
What I do have to share today is a dessert treat recipe I've been making forever. It is perfect for bringing along to cookouts and parties, although I must warn you it does have peanut butter in it. This has actually limited where I can bring along this item, such as school or school-related events. But these are so delicious I had to share. 

 Enjoy :)


Ingredients:

1 cup white sugar
1 cup white Karo Syrup
1 cup peanut butter
6 cups Rice Krispies
12oz. pkg. semi sweet chocolate chips
12oz. pkg. butterscotch chips


Directions:

1} In large pot over medium heat stir together 
sugar and Karo Syrup til boiling

2}  Remove from heat and stir in peanut butter

3} Add all the Rice Krispies and mix til thoroughly coated 

4}  Press mixture into a buttered 9"x13" pan

5} Place semi sweet and butterscotch chips in smaller pot

6}  Melt over low heat til combined and smooth stirring frequently

7}  Pour over treats and spread over top

8} Let set then cut into squares


Does anyone else out there make these?  
It's a yummy twist on your regular Rice Krispie Treats :)

Be sure to stop back tomorrow for my "Fabulous Friday Finds" post!  
What will my theme be this week???

Have a great day :)

xo,

Photobucket
Share this PostPin ThisShare on TumblrShare on Google PlusEmail This