.

.

.

.


Blogarama - The Blog Directory


GOOGLE FRIEND CONNECT

Showing posts with label baking. Show all posts

February 27, 2012

Mmm, Recipe time!

A few weeks I did a post about a delicious fudgy cake that I made for my daughter's birthday. Today I will share this recipe with you. In case you missed this post, the name of the cake is "Black Magic Cake".

Over the years I've tried many, many different fudge cake recipes, but none of them turned out as fudgy as I liked ~ until I came across this recipe!

Black Magic Cake


 1-3/4 sifted flour                        
 2 cups sugar                               
 3/4 cup cocoa                             
 2 tsp baking soda                       
 1 tsp baking powder                   
 1 tsp salt
 1/2 cup oil
 2 eggs
 1 cup strong black coffee
 1 cup buttermilk    
 1 tsp vanilla

Directions:

* Sift together dry ingredients 
* Add eggs, oil, coffee, buttermilk, and vanilla
* Beat with mixer at medium for 2 minutes
* Pour batter into greased 9x13 pan
* Bake at 350 deg. for 40 minutes
* Cool in pan on rack
* Frost as desired

{ I adapted this reciped just a bit by just mixing together the dry ingredients in a bowl without sifting, and using 8x8 round cake pans greased, with wax paper lining the bottoms, and floured. As far as I could tell the sifting is not required, although I am no professional here!  As for the pan size if you decide to use round cake pans as I did you must must do the greasing, wax papering, and flouring..  Otherwise the cake may not come out of the pan as it is very moist. Which is what a fudgy cake is all about! }

Enjoy :)

xo,
Photobucket

Come join the fun over here!
Share this PostPin ThisShare on TumblrShare on Google PlusEmail This

January 3, 2012

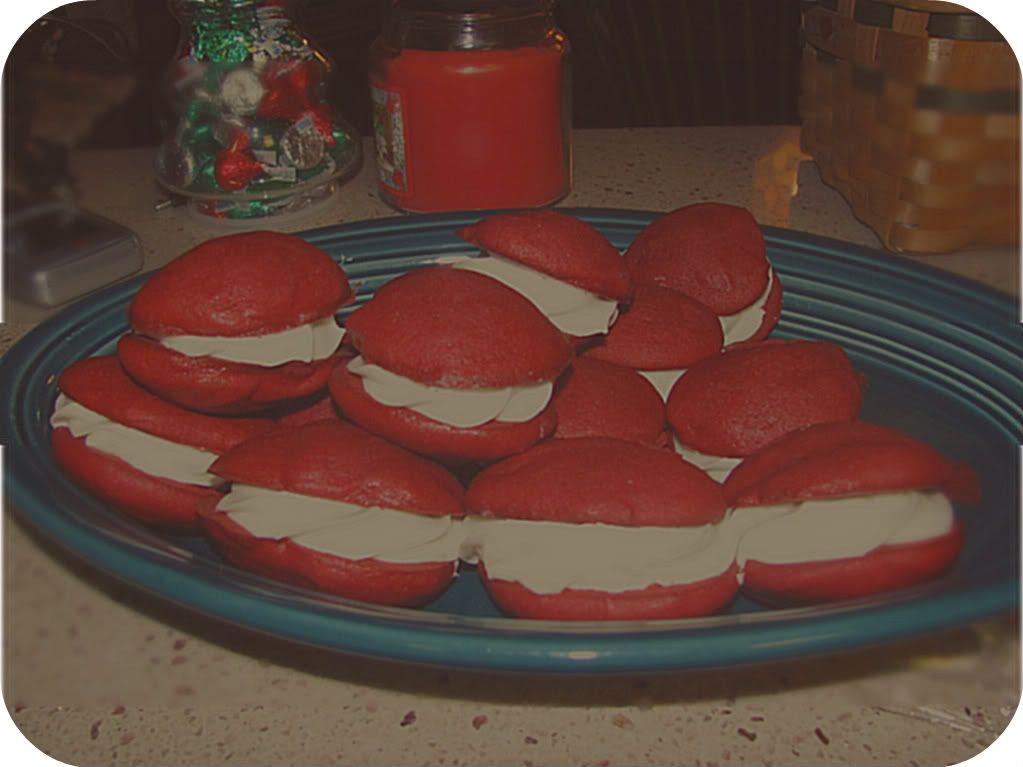
Red Velvet Whoopie Pies!


In my family "Whoopie Pies" were a common dessert that we loved as kids, and still love today. You may ask "what is a Whoopie Pie?". I've read a bit about how in different parts of the United States this dessert is also called "Moon Pies", and in some parts of the US they are unheard of. As for other countries, I'm curious as to whether or not these even exist??

Anyways, regular "Whoopie Pies" are little chocolate cakes the size of a cookie, or larger if desired. You mix the batter, bake little circles of the batter on cookie sheets, and then fill them with a creamy filling similar to buttercream frosting, but with fluff added to the mix.

Over the holidays I wanted to make something not just special, but kid-friendly as well. I started brainstorming ideas such as a "Red Velvet Cake" or cupcakes. Then I wondered if there was a recipe out there for "Red Velvet Whoopie Pies", and sure enough there was.

I located a good recipe that did not call for a boxed cake mix to be used, as most of the other recipes I found did. It was a bit of a risk making something semi-new for a holiday, but I decided to take a chance and the results were fantastic. They were so yummy in fact that I decided to share the recipe :)


Red Velvet Whoopie Pies
Adapted from Grouprecipes.com
Makes approx. 60) 1", 42) 2", or 24) 3"

Cake Ingredients

2 cups all-purpose flour
2 Tbsp. unsweetened cocoa powder
1/2 tsp. baking soda
1/4 tsp. salt
1/2 cup butter, softened
1 cup packed brown sugar
1 egg
1 tsp. vanilla
1/2 cup buttermilk
1) 1 oz. bottle red food coloring (2 Tbsp.)


Cake Directions

1) Preheat oven to 375 degrees.  Lightly grease two cookie sheets. Set aside.

2) In a medium bowl combine flour, cocoa powder, baking soda and salt.  Set aside.

3) In a large mixing bowl beat butter on medium to high speed for 30 seconds.  Beat in brown sugar til light and fluffy.  Beat in egg and vanilla. Alternately add flour mixture and buttermilk, beating well after each addition, but until just combined. Stir in food coloring.

4)  Spoon batter onto cookie sheets in 1" or 2" diameter rounds, leaving 1" between each. (If you'd like them a bit larger you can go up to 3", but you won't have as many.)

5) Bake 7-9 minutes for 1" sizes, 9-11 for 2" sizes, and estimate timing for larger sizes, all until tops are set.

6) Carefully remove from baking sheets and cool on racks.

 
Filling Ingredients
1/4 cup butter, softened
4 oz. cream cheese, softened
1) 7 oz. jar marshallow cream
2-4 cups confectionary sugar

Filling Directions
7) In a medium mixing bowl beat butter and cream cheese until smooth.  Fold in marshmallow cream.

8) This is where I made an adjustment to the filling recipe;  Add 2-4 cups of confectionary sugar, or until filling is of desired consistency. 

9) To fill, dollop filling on the flat sides of half of the cakes, and top with remaining cakes, flat sides down. 

Enjoy!

Photobucket
Share this PostPin ThisShare on TumblrShare on Google PlusEmail This

December 23, 2011

let them eat cookies !!!


Yay, I've completed three more batches of Christmas cookies! 

Yesterday was my biggest baking day so far.  I completed sugar cookies, Russian Teacakes (although I like to call them "Snowballs"), and Chocolate Bon~Bons.  

Today I will make my final batch of cookies which I will post tomorrow, along with the recipe. What are they?  Stop by tomorrow to find out!  They are my most favorite and I can't wait to share :)   


Photobucket
Share this PostPin ThisShare on TumblrShare on Google PlusEmail This

December 22, 2011

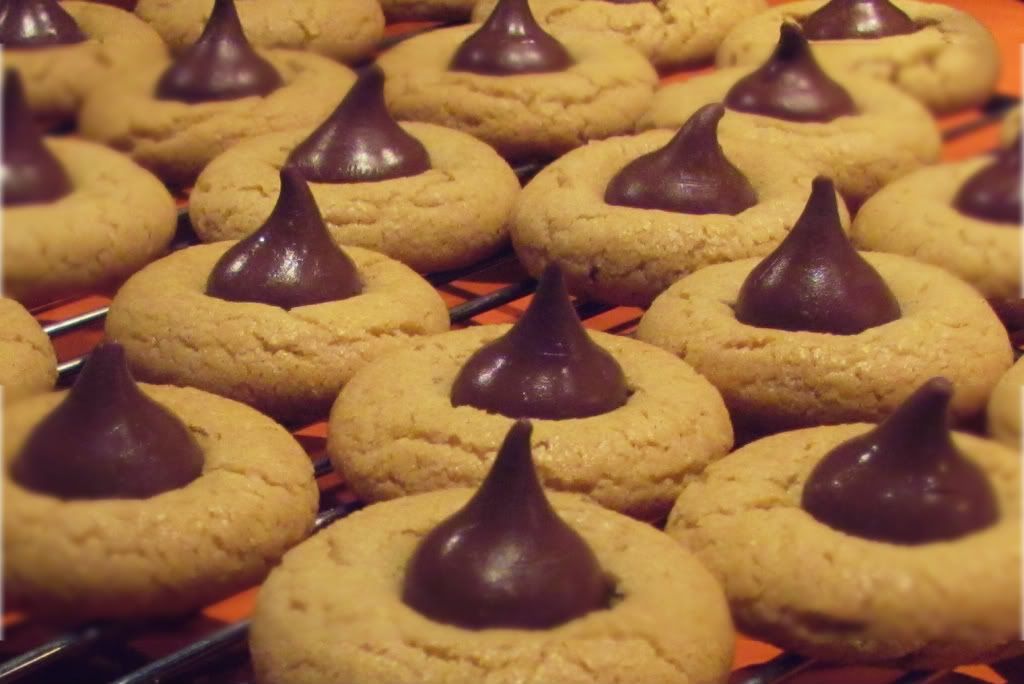
a Christmas kiss . . .


I've finally begun my holiday baking beginning with these little goodies above. One batch never seems to be enough, so of course I made a double-batch. It's difficult to keep everyone away from them while they are cooling, and a bunch are already missing!

The best it yet to come though. My favorite holiday cookies are one's that my grandmother would make for us every year. Not only do they bring back many memories for me, but they are delicious, AND cute!

Over the next few days I will be sharing more cookies photos, as well as the recipe for my favorites that I mentioned above. So back to the kitchen I go to become covered in flour from head to toe.
(<----Yes this is true :) Maybe I'll share a photo of this as well!


Photobucket
Share this PostPin ThisShare on TumblrShare on Google PlusEmail This

August 3, 2011

summer sweets

Normally I am all for chocolate desserts, cookies, cakes, cupcakes etc., but while browsing through blogs the other day I inadvertantly found a recipe for "Blackberry Pie Bars".  Something about this recipe made me feel like I HAD to make these.

I found some nice big blackberries and began baking, unsure of what the outcome would be.  With me it could go either way ~ good or bad :)  I have to say the results were so delicious that I decided I must share this amazing recipe! 


Blackberry Pie Bars
adapted from Rebecca Rather, The Pastry Queen

Crust and Topping
3 cups all-purpose flour
1 1/2 cups sugar
1/4 tsp salt
1 1/2 cups (3 sticks) unsalted butter, chilled

Fruit Filling
4 large eggs
2 cups sugar
1 cup sour cream
3/4 cup flour
pinch salt
zest of 1/2 lemon
1 tsp almond extract
2 (16-oz) packages frozen blackberries, thawed and drained {I used fresh} 

To make the crust and topping, preheat the oven to 350 degrees. Grease a 9x13 inch baking pan.

Combine the flour, sugar, and salt in the bowl of a food processor. Pulse a few times to mix. Cut the butter into 1/2-inch cubes, and add to the flour mixture. Process until the butter is evenly distributed but the mixture is still crumbly, 30-60 seconds.

Reserve 1 1/2 cups of the mixture to use as the topping. Press the remaining mixture into the bottom of the pan, and bake 12-15 minutes. Cool for at least 10 minutes.

To make the filling, whisk the eggs in a large bowl, then add the sugar, sour cream, flour, salt, lemon zest, and almond extract. Gently fold in the berries and spoon the mixture over the crust. Sprinkle the remaining flour mixture evenly over the filling, and bake 45 to 55 minutes.

Cool at least 1 hour before cutting into bars, or scoop out of the pan to serve cobbler-style.

~~~~~~ 

This dessert was so amazingly yummy that I returned to this same blog to look through all the different recipes available.  If your looking to try something new, I highly recommend visiting this blog as well.  Here is the link to the home page ~ http://www.pink-parsley.com/.  Enjoy :)

♥ Paula
Share this PostPin ThisShare on TumblrShare on Google PlusEmail This

July 29, 2011

OMGoooodness!!!

I don't know whether these are a new creation, or if they've been around forever, but I just discovered them a few months ago. At first it seemed like a cool idea for someone whose into that sort of stuff, but after looking at pictures of what you can do with them, I have become completely obsessed!!! (And I know I say that a lot, but I really mean it this time :)

What am I talking about??    C A K E P O P S !!!

From what I've read so far you bake a 9x13 sized cake, crumble it all up into a bowl, mix in frosting, shape the mixture into balls, insert a lollipop stick, freeze for a bit, then decorate! And when I mean decorate take a look at these examples below!


I now need to find an excuse to make 40-50 of these little treats (thats how many one cake will yield).

If you'd like to try making a batch of these yourself there are plenty of recipes and instructions online.  You can also visit Amazon where there is a bunch of books available to choose from, for complete instructions and pictures for design ideas ~ Cake Pops Books!

If I decide to go ahead and attempt these I will share photos, tips, etc.!!

Happy Friday :)
♥ Paula


Share this PostPin ThisShare on TumblrShare on Google PlusEmail This