.

.

.

.


Blogarama - The Blog Directory


GOOGLE FRIEND CONNECT

Showing posts with label holiday. Show all posts

December 6, 2016

Holiday Photos!


Here in New Hampshire our week started with our first real snowfall. Only about three inches fell, but it was enough to create a traffic nightmare as it began during the morning commute. Most schools were not delayed or cancelled, and there were many, many accidents. Luckily I didn't need to travel this morning, so we went outside and had lots of fun playing in the snow.

I love how excited my little one gets when she sees the snow. She was so excited to bundle up and get outside. Now that we have a bit of snow, and I have most of my Christmas shopping done, I'm feeling excited about the holidays.


And I'm even more excited to share some of the holiday photos that I had taken of my two youngest girls...Autumn who is 13, and Star who will be three at the end of January.


I found a terrific photographer who was so kind to squeeze me into her schedule, and she was great with my girls. And best of all I discovered that she is also a blogger. To see her info you can scroll down to the end of this post! 


Now here are a few of my favorite photos from the shoot!


Photo credit Jennifer Haas Photography

Photo credit Jennifer Haas Photography

Photo credit Jennifer Haas Photography

Photo credit Jennifer Haas Photography

Photo credit Jennifer Haas Photography

Photo credit Jennifer Haas Photography


Photo credit Jennifer Haas Photography

Photo credit Jennifer Haas Photography

Photo credit Jennifer Haas Photography


In many of the photos Star has perfected the fake smile, but there are some good ones with her true smile. Now comes the difficult part of choosing my favorites for printing!

Do you normally have holiday photos taken of your family? One day I hope to get all four of my children together in one photo. Perhaps on Christmas Day! 

If you'd like to take a peek at Jennifer's blog here's the link: 
Plain Vanilla Mom

You can find all her social media links there as well. 

And if you'd like to check out her photography Facebook page here's the link there: Jennifer Haas Photography

If you connect with her let her know I sent you!

Here on the blog I do have a few upcoming posts which are pretty exciting. They include a new post and giveaway for JORD Wood Watches, and a very cool review of a new book series just for girls. And as usual my No Rules Weekend Blog Party will begin Thursday morning at 6am!

Have a great week!!


Share this PostPin ThisShare on TumblrShare on Google PlusEmail This

May 26, 2014

Do you know how Memorial Day was started?


I thought I did, but I was wrong! 

The other day as I scanned over my friends Facebook posts I came across a link posted by one of my friends.  KNOW YOUR HISTORY it said in all caps, along with an old photo which grabbed my attention.!

What I read next was very surprising to me, and now I know how this national holiday really began.

Check this out!


Sincerely,
Paula
Share this PostPin ThisShare on TumblrShare on Google PlusEmail This

December 20, 2012

Oh so Pinteresting ...


1} Fun for Kids - Erupting Volcano!

2} Beautiful Landscape

3} Amazing Oven!

                     4} Something Deliciously Homemade!

5} A gorgeous bag I could never afford

6} Something I’d love to make myself

                          Photo Source
7} A handy dandy little tip to remember

8} A super cute holiday treat

9} Because handmade = love


10} A lovely little poem 

Are you on Pinterest? 
If so what is your most recent, favorite pin?


L o o k i n g   A h e a d:

Tomorrow is Friday, and I'm going to change things up a bit for the next few weeks as I've been so busy with Christmas preparations, and I'm sure many of you are as well.  

Instead of my weekly Fabulous Friday Finds post, I will begin my NO RULES Weekend Blog Party on Thursday afternoon! You can stop by anytime and link up anything! How fabulous is that?!

Once quick note about blog comments before I go ~ Normally I stop by each and every blog who links up and leave a meaningful comment.  This is because I truly appreciate the time and effort you took to stop by and join my party. Unfortunately last week the party was the largest yet, and I have still not been able to catch up on all the comments. Therefore I want to let everyone know that I am grateful for each and every linkup and comment left, and I will try my best to return the love! 


Sincerely,


Paula
Share this PostPin ThisShare on TumblrShare on Google PlusEmail This

December 11, 2012

Easy Christmas Craft ...


Awhile back I mentioned that I was planning on making some of my Christmas decorations this year.  Well, I haven't made it all that far with all the shopping and planning I've been doing.  You may remember a few weeks ago I shared my handmade Christmas Yarn Wreath with pom poms, and my handmade elf skirt, but that's pretty much all I've had time for for personal projects.  

You may also remember my big plan for creating my own handmade Christmas village.  That is now out the window.  I have to admit that this is because I spotted some of the prettiest, pastel, sparkly houses while out and about one day.  And the best part was that they were cheap!  How could I resist?  

Anyways, back to my easy (and super cheap!) Christmas craft that I like to call the Jar O' Christmas GLAM!  It all started when I spotted these pretty little glittery balls of goodness.  I didn't know what to do with them, but I had to have them.  

And this is what I came up with ~


Cost breakdown:

The glittery balls I found at AC Moore craft store.  They were originally $7.00, but I had a 50% off coupon bringing them down to just $3.50.  Then the rest just came to me. I purchased a clear glass vase from the dollar store ($1), and this little white tree from Walmart (.75).  The twine I already had on hand.

Total cost for this project ~ $5.25!

Now to the super-duper easy assembly!  Pour your desired amount of sparkly balls into your vase, stick the tree in there positioned wherever you like, and tie on the twine!    

Project completion time ~ approx. 7 minutes!  

L o o k i n g   A h e a d :

If you participate in Wordless Wednesday I'd love for you to 

stop back later this afternoon for my Wordless Wednesday Blog Party!  

It will be open at 12 PM US EST today, and will remain open until 
Friday afternoon.  {I always return the Linky L♥ve!}


Sincerely,


Paula


Share this PostPin ThisShare on TumblrShare on Google PlusEmail This

December 6, 2012

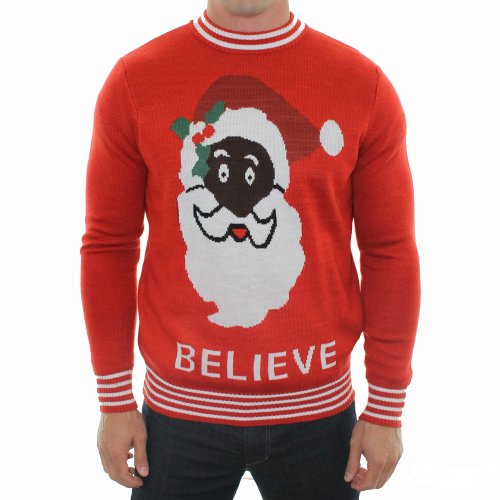
The ugly Christmas sweater ...

I was in need of a bit of humor today, and decided that today's post would be all about the ugly Christmas sweater.  

Before I begin I want to say that I really am sorry if I offend anyone who wears these sort of sweaters and enjoys it, but they make me laugh.  A lot.

So as Santa might say, "onward and upward" we go to a creepy little showcase!  


Which of these sweaters do you think is the ugliest? I just can't decide.  I'm thinking maybe the last one that lights up, although I did giggle at each and every one of them :)

Now I'm going to be brave and ask who proudly wears their ugly Christmas sweater every year?  If your one of them, I once again apologise.  I understand that everyone has their individual opinions, and this post was just in fun.  No harm intended :)


L o o k i n g   A h e a d:

Tomorrow is Friday, and I'm going to change things up just a bit for the next few weeks as I've been so busy, and I'm sure you are as well.  

Instead of my weekly Fabulous Friday Finds post, I will begin my NO RULES Weekend Blog Party on Friday morning! You can stop by anytime and link up anything! How fabulous is that?!

Hope to see you there :)


Sincerely,


Paula
Share this PostPin ThisShare on TumblrShare on Google PlusEmail This

January 3, 2012

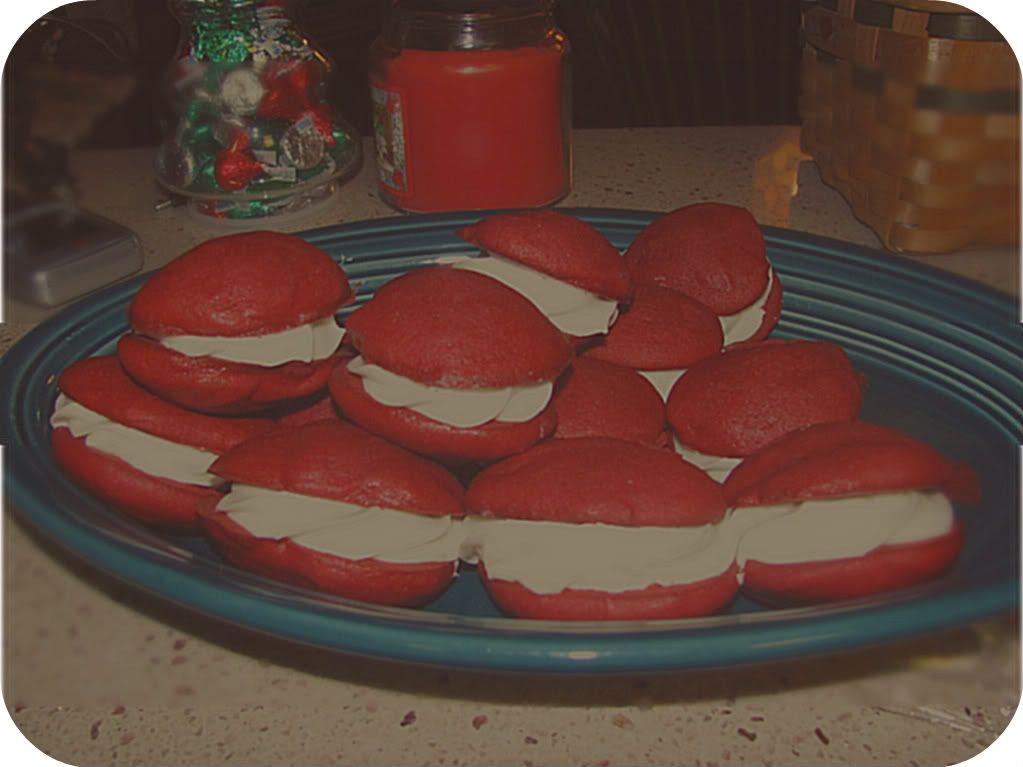
Red Velvet Whoopie Pies!


In my family "Whoopie Pies" were a common dessert that we loved as kids, and still love today. You may ask "what is a Whoopie Pie?". I've read a bit about how in different parts of the United States this dessert is also called "Moon Pies", and in some parts of the US they are unheard of. As for other countries, I'm curious as to whether or not these even exist??

Anyways, regular "Whoopie Pies" are little chocolate cakes the size of a cookie, or larger if desired. You mix the batter, bake little circles of the batter on cookie sheets, and then fill them with a creamy filling similar to buttercream frosting, but with fluff added to the mix.

Over the holidays I wanted to make something not just special, but kid-friendly as well. I started brainstorming ideas such as a "Red Velvet Cake" or cupcakes. Then I wondered if there was a recipe out there for "Red Velvet Whoopie Pies", and sure enough there was.

I located a good recipe that did not call for a boxed cake mix to be used, as most of the other recipes I found did. It was a bit of a risk making something semi-new for a holiday, but I decided to take a chance and the results were fantastic. They were so yummy in fact that I decided to share the recipe :)


Red Velvet Whoopie Pies
Adapted from Grouprecipes.com
Makes approx. 60) 1", 42) 2", or 24) 3"

Cake Ingredients

2 cups all-purpose flour
2 Tbsp. unsweetened cocoa powder
1/2 tsp. baking soda
1/4 tsp. salt
1/2 cup butter, softened
1 cup packed brown sugar
1 egg
1 tsp. vanilla
1/2 cup buttermilk
1) 1 oz. bottle red food coloring (2 Tbsp.)


Cake Directions

1) Preheat oven to 375 degrees.  Lightly grease two cookie sheets. Set aside.

2) In a medium bowl combine flour, cocoa powder, baking soda and salt.  Set aside.

3) In a large mixing bowl beat butter on medium to high speed for 30 seconds.  Beat in brown sugar til light and fluffy.  Beat in egg and vanilla. Alternately add flour mixture and buttermilk, beating well after each addition, but until just combined. Stir in food coloring.

4)  Spoon batter onto cookie sheets in 1" or 2" diameter rounds, leaving 1" between each. (If you'd like them a bit larger you can go up to 3", but you won't have as many.)

5) Bake 7-9 minutes for 1" sizes, 9-11 for 2" sizes, and estimate timing for larger sizes, all until tops are set.

6) Carefully remove from baking sheets and cool on racks.

 
Filling Ingredients
1/4 cup butter, softened
4 oz. cream cheese, softened
1) 7 oz. jar marshallow cream
2-4 cups confectionary sugar

Filling Directions
7) In a medium mixing bowl beat butter and cream cheese until smooth.  Fold in marshmallow cream.

8) This is where I made an adjustment to the filling recipe;  Add 2-4 cups of confectionary sugar, or until filling is of desired consistency. 

9) To fill, dollop filling on the flat sides of half of the cakes, and top with remaining cakes, flat sides down. 

Enjoy!

Photobucket
Share this PostPin ThisShare on TumblrShare on Google PlusEmail This

December 26, 2011

memories in the making . . .


Photobucket
Share this PostPin ThisShare on TumblrShare on Google PlusEmail This

December 22, 2011

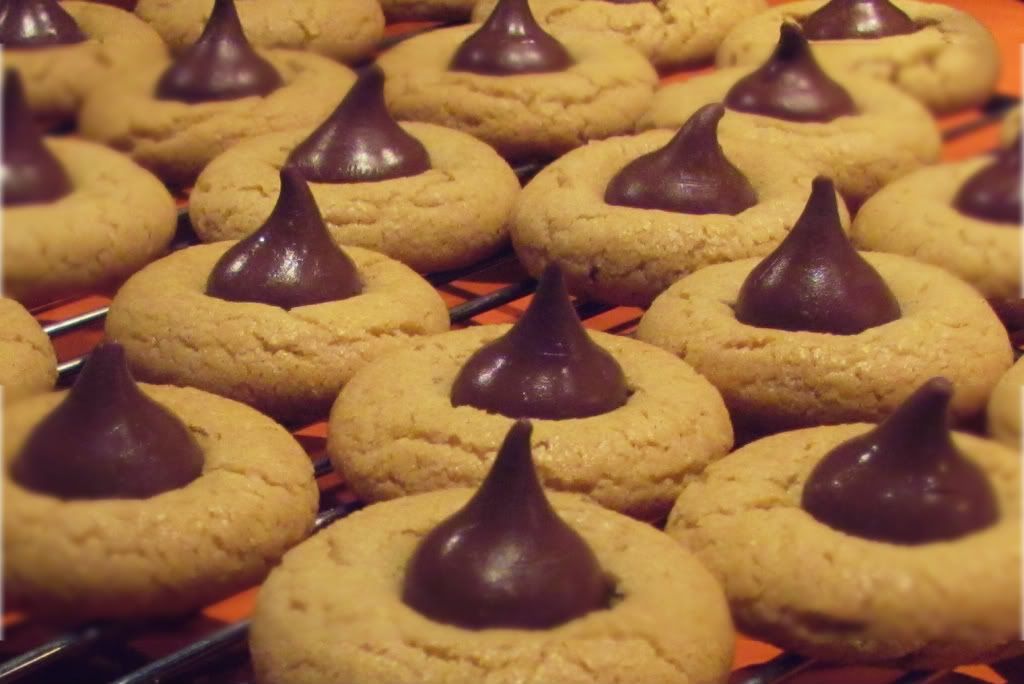
a Christmas kiss . . .


I've finally begun my holiday baking beginning with these little goodies above. One batch never seems to be enough, so of course I made a double-batch. It's difficult to keep everyone away from them while they are cooling, and a bunch are already missing!

The best it yet to come though. My favorite holiday cookies are one's that my grandmother would make for us every year. Not only do they bring back many memories for me, but they are delicious, AND cute!

Over the next few days I will be sharing more cookies photos, as well as the recipe for my favorites that I mentioned above. So back to the kitchen I go to become covered in flour from head to toe.
(<----Yes this is true :) Maybe I'll share a photo of this as well!


Photobucket
Share this PostPin ThisShare on TumblrShare on Google PlusEmail This

December 5, 2011

'Tis the season for . . .

... Christmas cards!


This past week I've been busy creating lots of handmade Christmas cards.  There's something special about a handmade card that you just can't replicate with a store bought card.  This is the latest batch I have up for sale and wanted to share. 


Photobucket
Share this PostPin ThisShare on TumblrShare on Google PlusEmail This

November 26, 2011

Cupcakes to die for !

Choosing which dessert to make for a holiday is always a tough decision. There are so many yummy things to pick from. For Thanksgiving dessert this year I decided upon Black Bottom Cupcakes. They are chocolately, but not overly sweet. The taste was described by my relatives as "to die for". So today I've decided to share my recipe with you :)


Black Bottom Cupcakes


1 6oz. package of cream cheese, softened
1/3 C sugar
1 egg
1 6oz. package (1 cup) semi-sweet chocolate chips
1-1/2 C all purpose flour
1 C sugar
1/4 C unsweetened cocoa
1 tsp baking soda
1/2 tsp salt
1 C water
1/3 C oil
1 tbsp vinegar
1 tsp vanilla

Heat oven to 350 F. Line 18 muffin cups with paper baking cups. In small bowl combine cream cheese, 1/3C sugar and egg, mix well. Stir in chocolate chips, set aside.

In a large bowl combine flour, 1 cup sugar, cocoa, baking soda and salt. Add water, oil, vinegar and vanilla. Beat 2 minutes on medium speed. Fill each paper-lined cup half full. Top each with 1 tbsp of cream cheese mixture. 

Bake at 350F for 20-30 minutes, or until cream cheese mixture is light golden brown. Cool 15 minutes and remove from pans. Cool completely then store in refrigerator.
Enjoy!

Photobucket
Share this PostPin ThisShare on TumblrShare on Google PlusEmail This

November 15, 2011

Thankful

My second to last post which was about cake pops was supposed to be my last fall project for the season. Then I figured why not make up two more sets of my "Thankful" place setting cards? These were popular items in my Etsy shop last fall, and I only had time to make one other set this fall, which has already sold on eBay.
So now both sets are up for grabs on eBay for a 3-day auction. If you like them come and get them!


Photobucket
Share this PostPin ThisShare on TumblrShare on Google PlusEmail This