.

.

.

.


Blogarama - The Blog Directory


GOOGLE FRIEND CONNECT

Showing posts with label tinted mason jars. Show all posts

June 16, 2012

Project FAIL

Remember the mason jar pinterest challenge redo I planned on doing? Notice how I never posted the results? Well I figured today should be the day to share them. 

 I was so confident that this time it was going to work. I searched near and far for what I assumed was going to be the magical products that would turn my streaky, lumpy, yucky mason jars into gleaming, glossy, smooth, beautiful, vintage-looking jars. And how did this latest attempt turn out??? It didn't. It was an epic FAIL!!


The yellow and blue jar above was my third time trying to get this DIY right.  Obviously it didn't work very well.  I used a tutorial that seemed to me to be foolproof.  The paints I used were Deco Permenamel and Deco Paint Thinner. The instructions stated that you thin the paint so that it is transparent, then you simply brush the outsides of the jar with this mix.  Well I made the paint as transparent as I could without it dripping off the jars, and it still wasn't all that transparent.  And it was still lumpy, streaky, blah.  

Next step was to bake the jars in the oven.  As some other DIY's I suggested, I figured the streaks would disappear, but noooooo.  All the baking did was seal the paint permanently to the jar exactly as it was.

Then I thought maybe, just maybe my problem was the shape of the jars.  I had chosen the curvy jar over the straight jars.  So I decided to find a straight jar to practice on.  I found an empty salsa jar, another tutorial, and tried it AGAIN.

This time the paint was smoother, less streaky, and more transparent.  I was so excited and was going to bake it when I turned the jar around and got a lovely surprise.  Just take a look at the photo below and you'll see what I mean.


This was actually a bit comical to me.  I just don't know what the issue is here.  I guess my final conclusion of this redo challenge is I was not meant to work with paint and glass.  That's the only thing I can think of.  
Does anyone have any suggestions on what you think went wrong?   

I am now moving onto another project which is to make a tutu and leotard/swimsuit for my daughters American Girl Doll.  Let's hope I have better luck with this project lol. I'll be sharing when their complete :)


Hope you all have a great weekend!


XO,

Photobucket
Share this PostPin ThisShare on TumblrShare on Google PlusEmail This

June 2, 2012

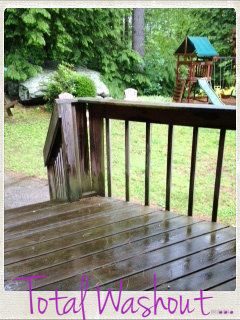
Forecast ... Rain

I know that we need it, and it makes everything more green and lush, but still I prefer a sunny weekend. I have plenty to keep me busy inside, and the rain will keep me there doing what I really should be doing instead of sitting out in the sun reading, going for a walk, or driving around with the windows open enjoying the warm air.


                                This is what my weekend plans include - laundry, Etsy orders and...


Taryne's Piano Recital


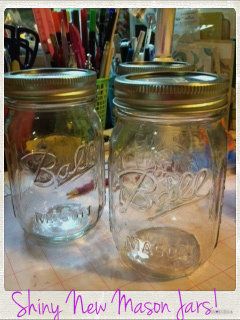
Hopefully beginning my Mason Jar Disaster Do-Over!

I hope you all have a great weekend and I'll be back on Monday.  Next week I'll have a bunch of photos to share, possibly a recipe, and definately the results to my Mason Jar Disaster Do-Over!!  

xo,

Photobucket
Share this PostPin ThisShare on TumblrShare on Google PlusEmail This

May 31, 2012

Pinterest Challenge Redo Announcement ...

A few weeks back I blogged about a Pinterest Craft Challenge I took on for tinted mason jars.  The jars in the photo for the DIY were so pretty, I decided I must have a rainbow of these jars for myself. I mean just look at them!! 

Photo source Pinterest.com

 It had all seemed so simple, but after two failed attempts my jars looked nothing like the ones pictured above :(  The paint looked too thick, streaky, and even a bit lumpy. I even made this statement at the bottom of my post "At this point I'm not sure if it was me or the DIY, but I will not be attempting this ever again.". 

{If you'd like to read the entire disastrous story click here ---> 

After giving up on this challenge, I angrily set my messed up jars on a windowsill where they have been since that day.  I just couldn't bring myself to throw them into the recycle bin after all the work I put into them.   

Lately though I have been having a change of heart, and whenever I walk by these jars I think to myself  that there must be a way to make this work!  So I now retract my statement about never attempting this again, and will try this ONE more time!  

I think I have come up with a different way for this project to work, but will it or won't it?

Stay tuned to find out  ... will post my FINAL results next week :)

Hope to see you back tomorrow for my weekly "Fabulous Friday Finds" blog post!
If you are new to my blog this is where I chose a theme, search Etsy for nine products which fit this theme, and then create a beautiful collage with a link to each shop featured. 

Have a great day!

xo, 
Photobucket
Share this PostPin ThisShare on TumblrShare on Google PlusEmail This

May 15, 2012

Pinterest Craft Challenge ...

Last week I mentioned that I had chosen a craft DIY project from Pinterest to try out. It all started out with an idea for a lovely, handmade Mother's Day gift for my Mom. When I first saw this DIY on Pinterest I knew right away what my Mother's Day gift would be this year ~ Tinted Mason Jars to hold flowers.


Aren't these so pretty? The photo above is the photo from the DIY.  The instructions were super simple, and I couldn't wait to make my own. All you needed to do was mix Modge Podge with food coloring, paint the insides, bake and voila! You'd have beautifully painted jars.  I purchased all the materials and got to work assuming that yes this would be a bit messy, but so worth it.

Well, did mine turn out like the one's shown above???  NO!   It was difficult to paint the insides of the jars and know if you used enough paint, or too little.  In addition it was really messy, and extremely smelly :P

Here are photos of my first attempt at this project. Some of the jars I coated more than others. The first photo is after I finished painting the jars.  The second photo is after I baked the jars.


 Where'd all the color go? I'll never know, but there was a film all on the inside that I proceeded to scrub out so I could start over using another method I found online.

This second method seemed fool-proof.  Use acrylic glossy enamel paint that would dry transparent, bake and voila! Such a better method ~ so I thought! But the paint wouldn't spread smoothly.  I figured after I baked them it would even out, but sadly it didn't.

     Here are photos from attempt #2.  The first is right after painting, and the last two are the finished project.


I do think they turned out pretty, but not at all what either DIY showed for their results.  At this point I'm not sure if it was me or the DIY, but I will not be attempting this ever again. 

Has anyone ever attempted this DIY resulting in jars which look like the one at the beginning of the post?
If so how did you achieve those results?

Be sure to stop back either later this afternoon or tomorrow for my Wordless Wednesday Link Party!! 
I have a bunch of photos I took this past week to choose from.  
Not sure yet which one will be "the one".  
Can't wait to see what you have!!     


   xo,
Photobucket


Share this PostPin ThisShare on TumblrShare on Google PlusEmail This